BEIL0014_The Bowl
The Bowl
First lesson, Remember to WEAR EAR PROTECTION ALL THE TIME.
Otherwise this tutorial will be the intro to be deaf but not to digital making.
After you
find a comfortable earplug with good noise reduction, you can follow me in to the
workshop and start the journey of making an aluminum bowl (Pot? Pan?). btw
finish the fundamental course first.
Step one:
(Spend $75 and
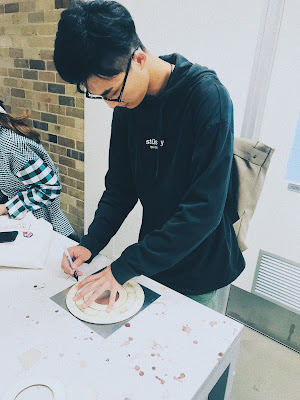
get a piece of metal sheet about 250x500mm and share half with your friends and)
draw some circles on the metal sheet so that later you can check if your bowl
is a perfect circle in any section plan.
Step two:
(Wait in the
queue for half hour and) cut your square sheet into circle.
Step three:
Smash, smash, smash, use
the large radius end of a nylon mallet, start from outside, try to stretch
the metal evenly. DON’T OVERDO IT! It is easier to stretch more, but hard to
compress. And remember to ask a best friend to take photo for you, so that you
can have some beautifuls photo to put on blog.
Step four:
When it gets close
to the center of the sheet, smash the sheet downwards (the other way compare to
the edge).
Step five:
Measure the
radius of your bowl all the time. Surprisingly, it only takes me 10 min to get
to r275, which according to Russell, the most difficult size to make because
there’s less room for mistakes. And I decided to make a bowl with r275.
Step six:
Smoothing your
bowl with English wheel.
Avoid rolling
on particular spot repetitively. Cuz English wheel = unlimited mallet smashing
and every time you roll on a spot, this spot will expend and become less
ductile. Fix the radius of your bowl during this process together with step 4
and 5.
Mark out the concave and convex part, and pay more attentions to fix these place.
Step seven:
Upside down the bowl, place on a flat surface to check the shape of the bowl.
Step eight:
Polishing. I don’t
have any polish medium for aluminum so far ( I found some 180 sandpaper in the
work shop and I leaves some ugly hopeless scarves on my lovely bowl. I should’ve
known this…) and I choose to polish the bowl with sandbag. (its soft and kinda
rough at the same time, and there is no other material better than this in the
smashing room.)
Step eight:
After one
hour of sanding (bottom and the edge of the bowl), my arms become super heavy and sore. And the result didn’t achieve
my expectations. Disappointed! I will find some other way to sand and polish
the bowl in the future.
Step nine:
Write the
blog. It’s really exciting to have another chance to listen to Russell’s
lecture and the tutor in this course are fantastic. Awesome course! and there are some more photos of the bowl.
 |
| 08.03.2018 2:19' |


Comments
Post a Comment